
Munchies: The Ultimate Bacon Cheeseburger – Juicy, Crispy, No Compromises
Munchies: The Ultimate Bacon Cheeseburger – Juicy, Crispy, No Compromises
This is the one. The burger that makes every sad drive-thru version feel like a betrayal. Thick, juicy beef with a proper crust. Thick-cut bacon that actually snaps. Cheese that melts into every crevice. A toasted bun that holds up but doesn’t fight you. Fresh crunch from lettuce and onion, bright acid from pickles and tomato, and a special sauce that ties the whole messy, glorious thing together.
This is Munchies material at its finest — the kind of meal you crave after a long session, on a weekend, or when you just need something that feels like a reward. It’s not fast. It’s not complicated. But it is done right.
We’re making four serious bacon cheeseburgers. Take your time with the technique. The difference between a good burger and a great one is mostly in the details and the heat.
Ingredients
For the burgers:
- 1½–2 lbs (680–900g) 80/20 ground beef (chuck is king; fresh ground or grind your own if you can)
- 8–12 slices thick-cut bacon
- 4 slices American cheese (or sharp cheddar, or a mix — American melts like a dream)
- 4 brioche or potato buns
- Kosher salt & freshly ground black pepper
- Butter or oil for toasting buns
Toppings (classic but elevated):
- Iceberg or romaine lettuce leaves
- Ripe tomato slices
- Thin red onion slices (or caramelized onions if you want to go next level)
- Dill pickles (or quick homemade pickles)
Special Sauce (mix these):
- ½ cup mayonnaise
- 2–3 Tbsp ketchup
- 1 Tbsp yellow mustard
- 1–2 Tbsp sweet pickle relish (or finely chopped pickles)
- ½ tsp garlic powder
- ½ tsp onion powder
- Pinch of smoked paprika or cayenne (optional)
- Salt & pepper to taste
- Optional: dash of hot sauce or Worcestershire
Step 1: Prep Everything (Mise en Place)
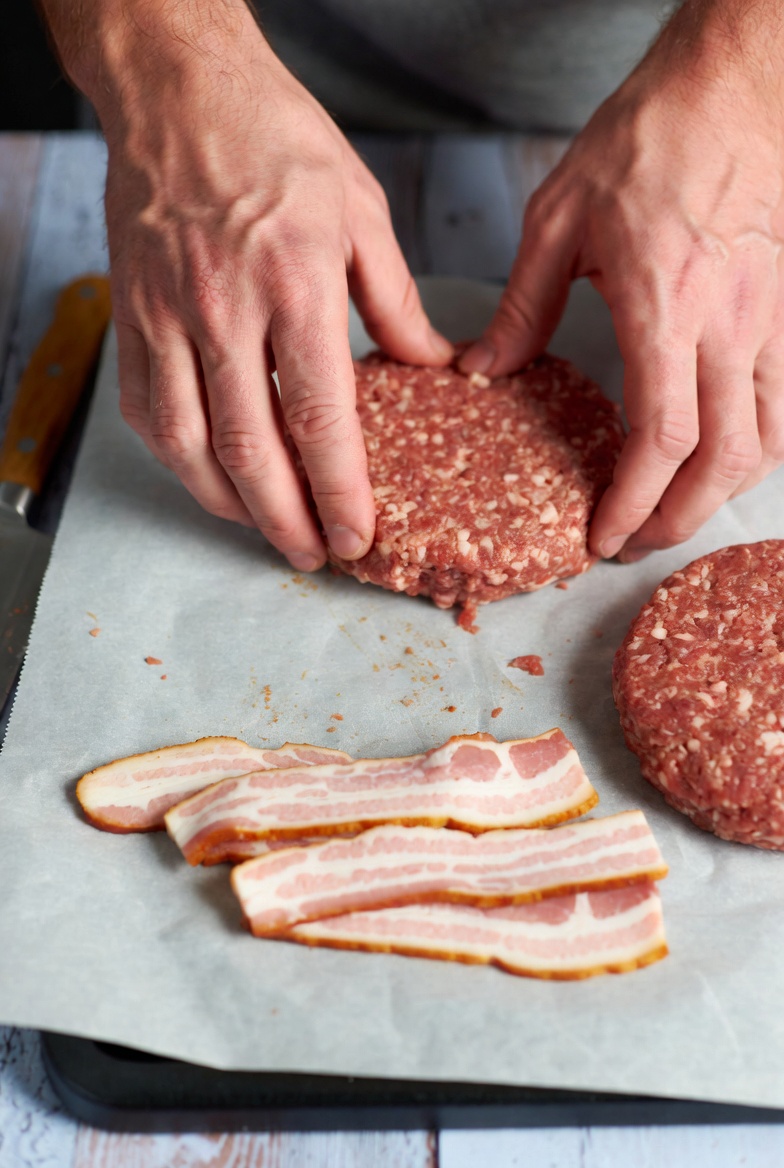
Portion the beef into 4 equal balls or loose patties (about 6–8 oz each). Don’t pack them tight — loose is juicy. If you’re doing smash burgers, keep them as balls. If you prefer thicker pub-style, gently form into patties with a slight dimple in the center (prevents puffing).
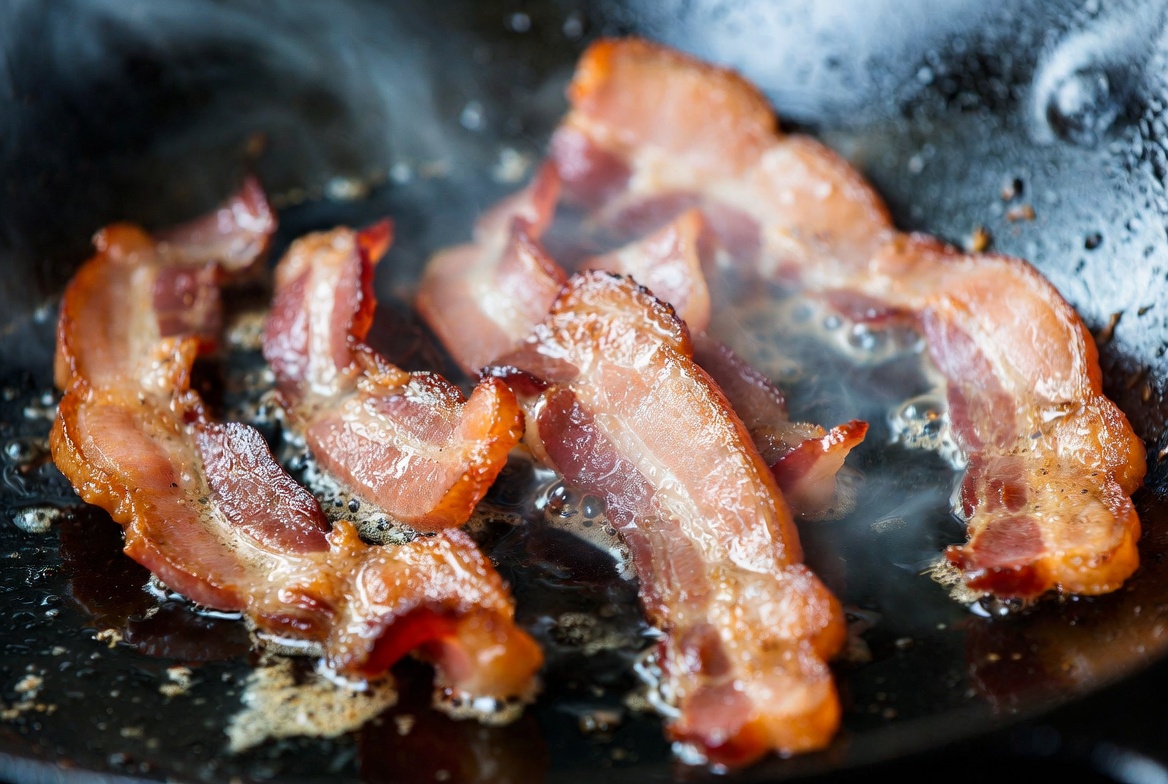
Cook the bacon first or alongside. Thick-cut bacon in a cast iron skillet or on a griddle over medium heat until crispy but not burnt. Drain on paper towels. Reserve a little bacon fat for the griddle if you want extra flavor.
Mix your special sauce and keep it cold. Slice the tomato, onion, and pickles. Wash and dry the lettuce.
Step 2: Cook the Bacon & Get the Griddle Hot
Get a cast iron skillet, griddle, or heavy pan ripping hot — medium-high to high. You want that Maillard reaction (browned crust) for maximum flavor.
Cook the bacon until it’s as crispy as you like it. Set aside. If using the same surface for burgers, pour off excess fat but leave a thin layer — it’s liquid gold.
Step 3: Sear the Patties (The Most Important Step)
Season the beef generously with salt and pepper right before it hits the heat (don’t do it early or it draws out moisture).
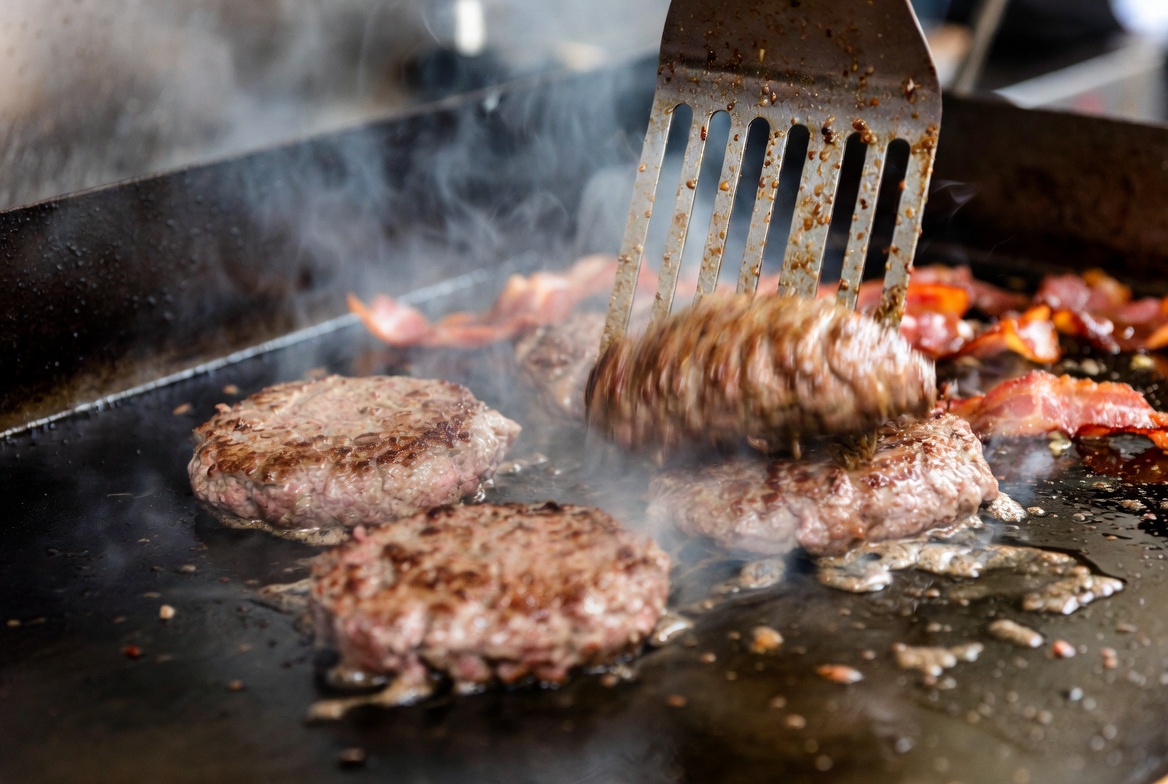
For smash burgers (highly recommended for max crust): Place beef balls on the hot griddle. Immediately smash hard and flat with a heavy spatula or burger press (use parchment paper between meat and press to avoid sticking). Press once, hard, then leave it alone. Cook 2–3 minutes until deep brown crust forms on the bottom. Flip once.
For thicker patties: Place formed patties on the hot surface. Sear 3–4 minutes without moving until a good crust develops. Flip and cook to desired doneness (135–140°F internal for medium-rare to medium is ideal for juicy burgers — they carryover cook a bit).
Real talk: Don’t press the patty while it’s cooking if it’s not a smash. You’re just squeezing out the juices you paid for.
Step 4: Cheese It Up
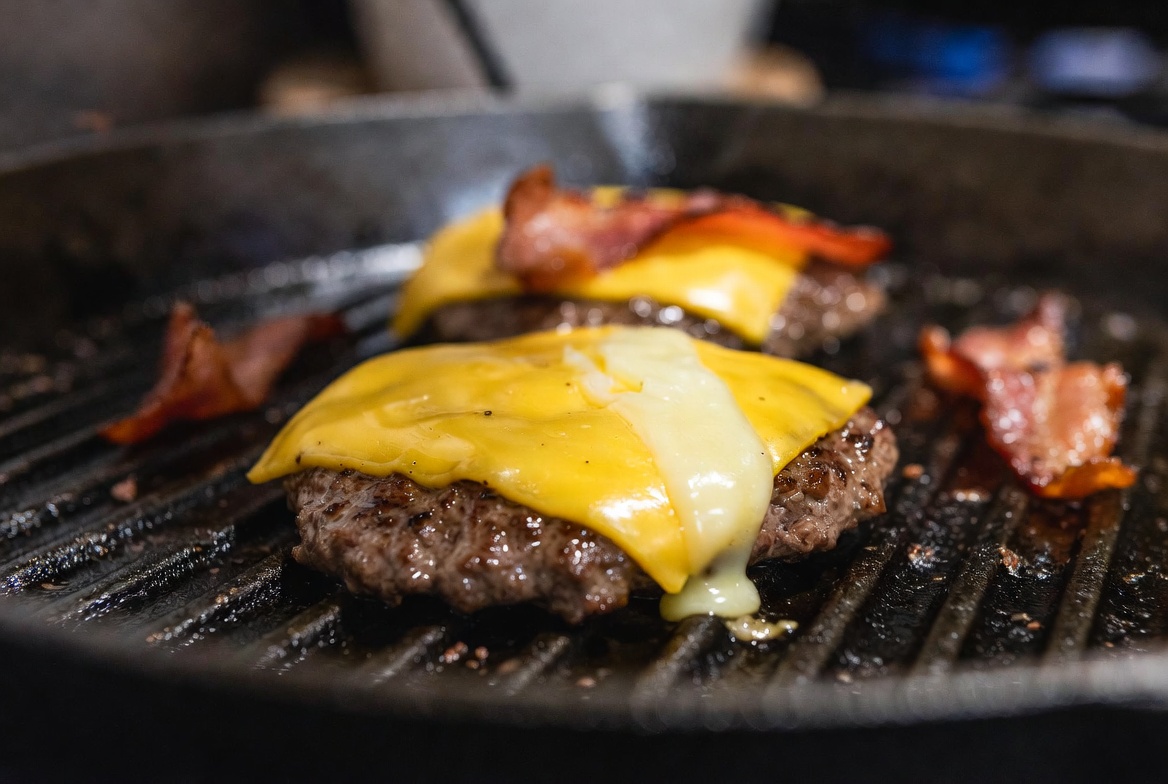
In the last minute or two of cooking, lay a slice of cheese on each patty. Add a tiny splash of water to the griddle and cover with a lid or dome for 20–30 seconds — the steam helps the cheese melt perfectly without overcooking the meat.
Pull the patties and let them rest 2–3 minutes. This is non-negotiable for juicy burgers.
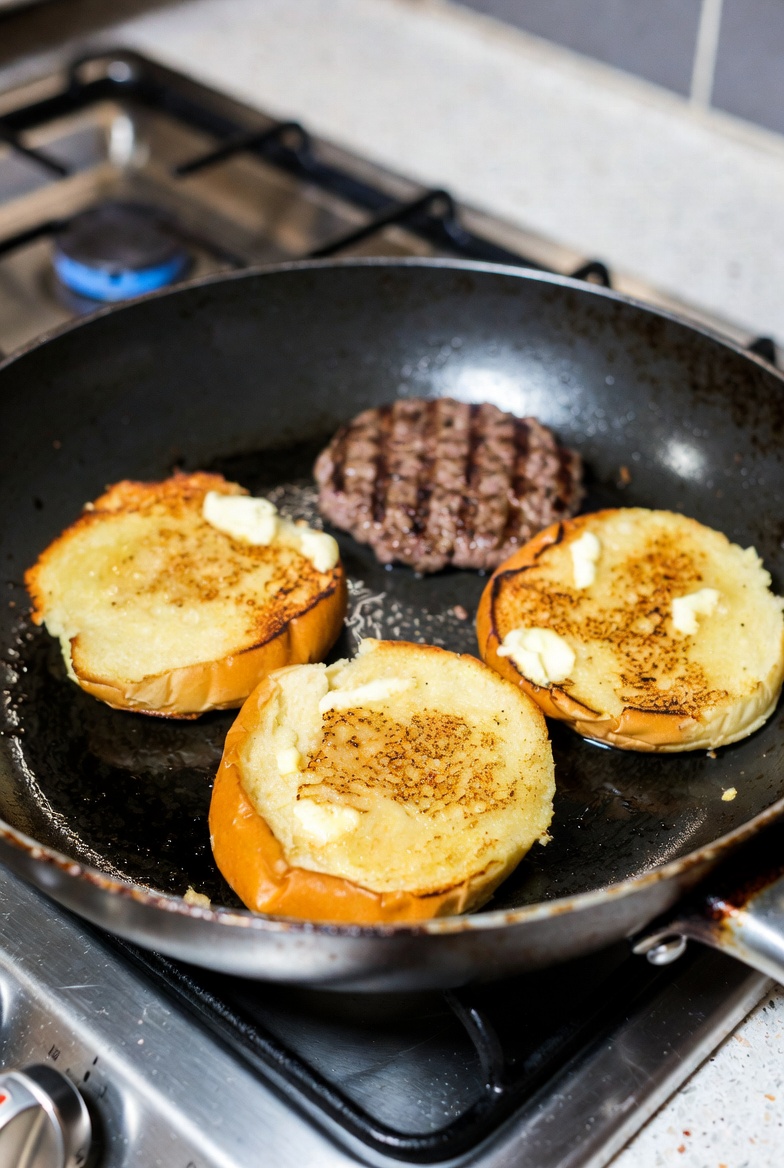
Step 5: Toast the Buns
While the patties rest, butter the cut sides of the buns and toast them on the hot griddle or in a skillet until golden and crisp. This keeps the bun from getting soggy and adds another layer of flavor.
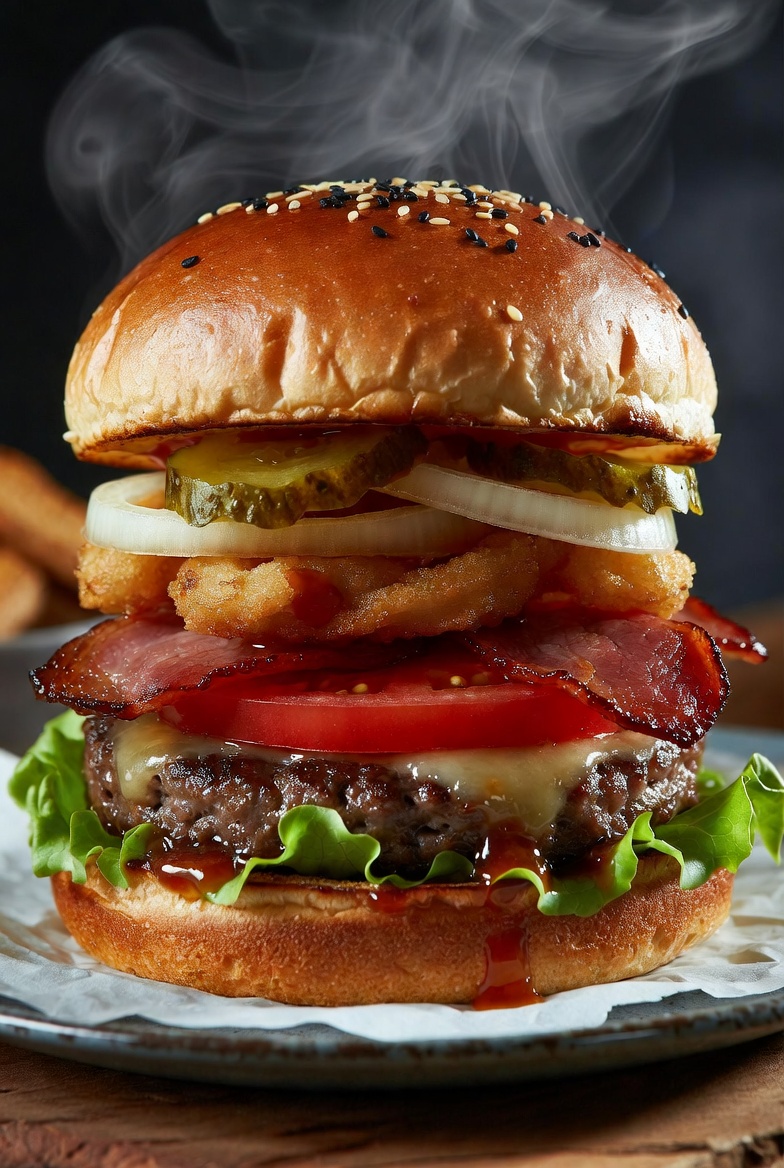
Step 6: Build It Like You Mean It
Bottom bun → special sauce → lettuce (acts as a barrier) → tomato slice → onion → cheesy patty → 2–3 strips of crispy bacon → pickles → more special sauce on the top bun → crown it.
Press down gently so everything marries. This thing is supposed to be messy.
Why This Is Actually the Best
- 80/20 beef has enough fat to stay juicy and flavorful even after high-heat cooking. Lean beef = dry sadness.
- High heat + crust = flavor. The browned bits are where the magic lives.
- Thick-cut bacon brings smoke, salt, and crunch that thin bacon can’t match.
- American cheese (or a good melting cheese) gives that perfect gooey pull. Cheddar brings sharper flavor if you prefer it.
- Special sauce is the secret weapon — creamy, tangy, slightly sweet, with just enough kick. Make it to your taste.
- Resting the patty lets the juices redistribute instead of running out on the first bite.
- Toasted bun is the difference between a burger that falls apart and one that holds together until the last bite.
Common Mistakes to Avoid
- Overworking or over-seasoning the meat early → tough, dry burgers.
- Cooking on low/medium heat the whole time → gray, steamed meat with no crust.
- Pressing thick patties while cooking → goodbye juices.
- Skipping the rest → dry first bite.
- Sad, untoasted buns → everything gets soggy fast.
Upgrades & Variations
- Add caramelized onions or grilled onions for sweetness.
- Swap in sharp cheddar + blue cheese for a bolder version.
- Quick pickled red onions instead of raw.
- Smash style vs thick pub style — both excellent, different vibes.
- Double the bacon if you’re feeling dangerous.
This is the bacon cheeseburger that makes you pause after the first bite. The kind you talk about later. The one that turns a regular night into something worth remembering.
Make it. Eat it. Get messy. Tag us with your version — we want to see that drip and that crust.
Next Munchies drop coming soon. Until then, keep the fire going — in the kitchen and everywhere else.
Fuel the lifestyle at thestonerreview.com. The fits that match this energy are waiting.


